After Effects Tip of the Week: Easily Smooth Keyframes with the Graph Editor
This week, we’ll show you how to use the Graph Editor to create buttery-smooth animations in After Effects — even if you’re just starting out.
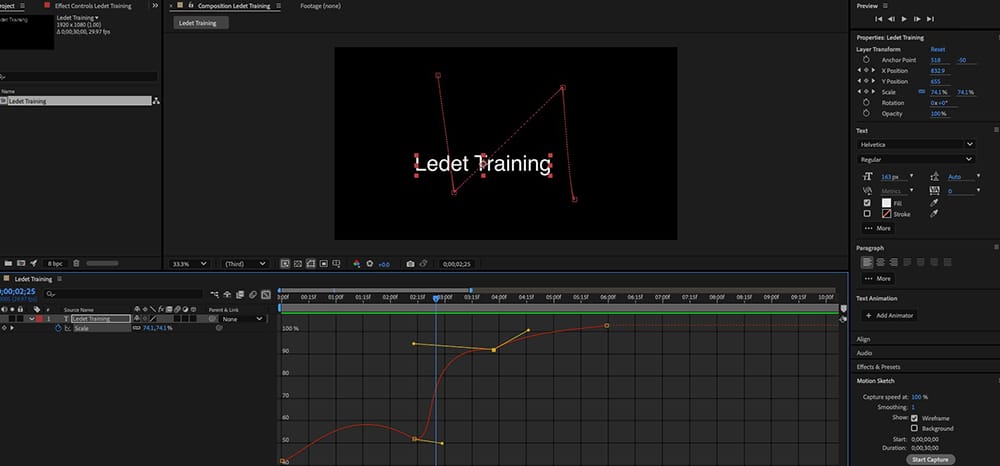
Step-by-Step: How to Smooth Keyframes Using the Graph Editor
- Animate Your Layer
Create an animation using position, scale, rotation, or any other property. Add keyframes as usual. - Select the Keyframes
Highlight the keyframes you want to smooth in the timeline. - Right-Click and Choose “Easy Ease”
This is your shortcut to more natural acceleration and deceleration. - Click the Graph Editor Icon
Located in the timeline panel — it switches your view to the animation graph. - Adjust the Speed Graph
Drag the bezier handles to tweak how fast or slow the animation eases in or out. For smoother motion, try creating an “S” shape in the speed graph.
When to Use This:
- UI/UX motion design for apps or websites
- Logo and title animations
- Slide-ins and fade-outs for explainer videos
- Any moment where you want motion to feel smooth and intentional
Pro Tip:
Use the Speed Graph instead of the Value Graph for motion-related properties like Position or Scale. It gives you more intuitive control over timing and flow — especially for UI and text animations.
Want your animations to look like a pro created them? Mastering the Graph Editor is the upgrade your workflow needs.