Audition Tip of the Week: Instantly Remove Background Noise with Adaptive Noise Reduction
If your voice recordings sound like they were made next to a fan or inside a fish tank, don’t worry — you don’t need to re-record.
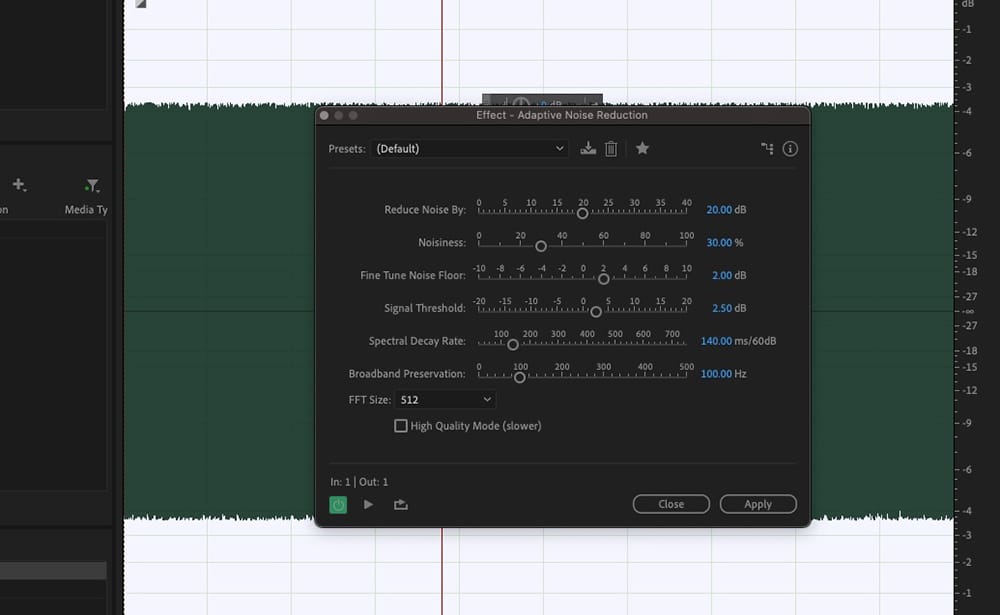
Step-by-Step: How to Use Adaptive Noise Reduction
- Import Your Audio
Open your clip in the Waveform Editor (not Multitrack mode). - Select the Entire Clip
Press Ctrl+A (Windows) or Cmd+A (Mac) to select all. - Go to Effects > Noise Reduction / Restoration > Adaptive Noise Reduction
- Adjust the Settings
In the effect panel:- Noise Reduction: Try 20–40 dB for most voice recordings
- FFT Size: Higher sizes give cleaner results, but increase CPU load
- Smoothing: Helps reduce artifacts
- Learning Time: Leave at default unless the noise profile changes dramatically mid-clip
- Preview and Apply
Use the preview button to hear the effect. Once satisfied, click Apply.
When to Use This:
- Cleaning up podcast vocals or interviews
- Polishing voiceovers for video content
- Prepping audio for YouTube, TikTok, or course modules
- Restoring old or field-recorded audio clips
Pro Tip:
If your background noise is consistent (like a hum or fan), use Noise Reduction (Process) instead. Capture a noise print, then remove only that sound without touching the rest of the audio.
Clear audio makes all the difference. Mastering noise reduction helps you sound professional — even if you’re recording from your closet.