Premiere of the Week: Smooth Out Shaky Footage with Warp Stabilizer in Premiere Pro
Nothing ruins great footage faster than unwanted camera shake. Instead of reshooting, Premiere Pro’s Warp Stabilizereffect can rescue your clip and give it a smooth, professional look.
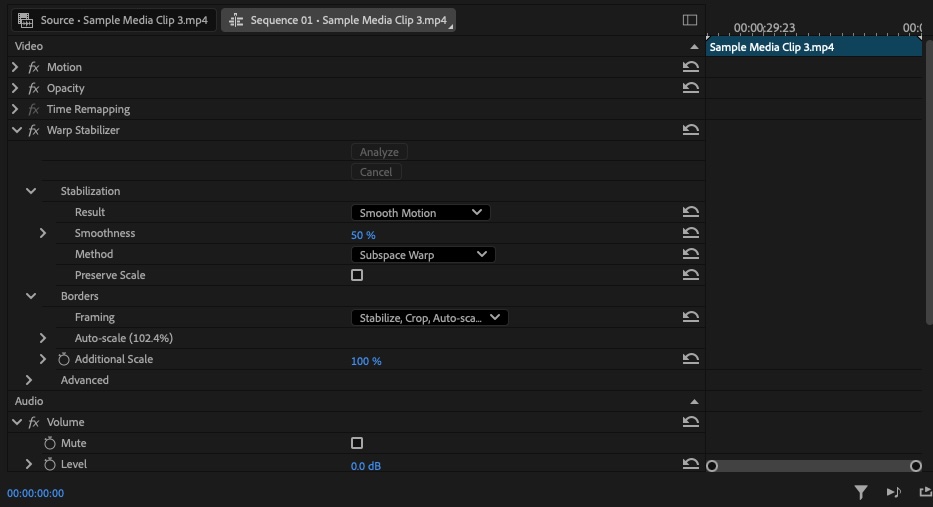
Here’s how to use it:
- Select Your Clip: Highlight the shaky clip in the timeline.
- Apply Warp Stabilizer: Go to Effects Palette > Distort > Warp Stabilizer and drag it onto your clip.
- Let Premiere Analyze: The software automatically scans your footage and applies stabilization.
- Fine-Tune Settings: In the Effect Controls panel, adjust Smoothness (default is 50%). Lower values look more natural, while higher values give stronger stabilization.
Why You’ll Love It:
- Salvages handheld or action footage.
- Instantly improves video quality without extra gear.
- Perfect for travel vlogs, interviews, and event coverage.
Pro Tip:
If your footage looks warped or distorted, switch the Method setting from Subspace Warp to Position, Scale, Rotation. This keeps stabilization clean without bending your video.
Next time shaky footage sneaks into your project, let Warp Stabilizer make it look like you shot it on a tripod.