Premiere Pro Tip of the Week: Speed Up Edits with Ripple Delete
Premiere Pro: Ripple Delete — the fastest way to cut and close gaps without lifting a finger (well, maybe one)
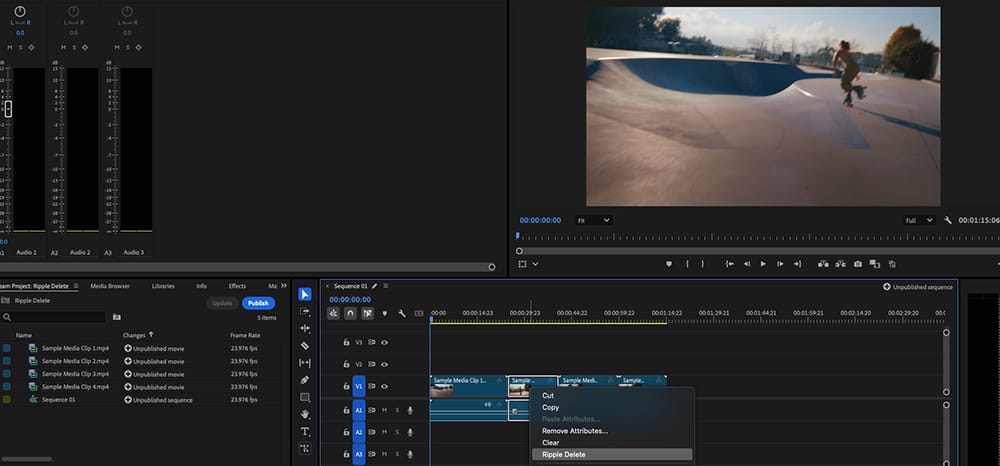
Step-by-Step: How to Use Ripple Delete
- Select the Clip You Want to Remove
Click directly on the unwanted clip or section in your timeline. - Right-Click and Choose “Ripple Delete”
Or use the keyboard shortcut: Shift + Delete (Windows) or fn + Delete (Mac). - Watch the Gap Close Automatically
Premiere deletes the clip and shifts everything after it left to fill the space — no dragging needed!
When to Use This:
- Trimming out awkward silences or mistakes in talking-head videos
- Rapid-fire rough cuts from longer footage
- Cleaning up B-roll sequences with tight transitions
- Making social media edits faster without manually shifting clips
Pro Tip:
You can also ripple delete a blank space between clips:
Right-click the empty area and choose Ripple Delete to instantly collapse the gap. This is especially helpful for cleaning up interview edits or jump cuts in a vlog.
Ripple Delete is one of those tiny tricks that makes a huge difference in your editing speed and workflow. Master this, and you’ll start slicing timelines like a pro in no time.